The minex3D app is of the thin client type, and is designed as small as possible within the constraints of the needs of a 3D visualization, and modeling platform. From its inception our solution has grown towards solving the issues of solutions which are: large, hardware hungry, requiring the user to undergo training and finally are expensive.
As a quick comparison the following chart contrasts some relevant aspects of both thin and thick client platforms:
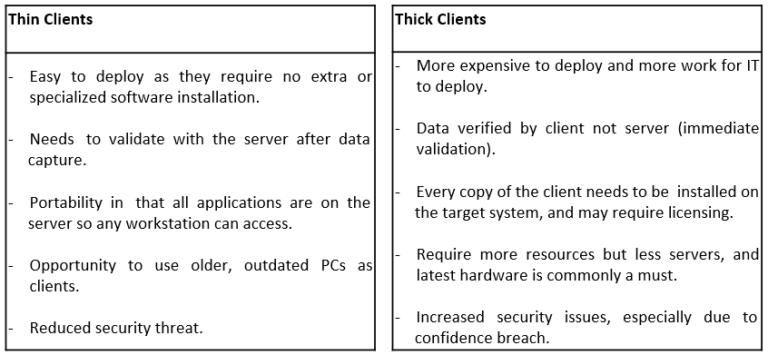
A relevant difference between the way thin clients are developed compared to thick clients is that the later use the large resources of the systems that are built for to offer the Swiss knife approach, so many miscellaneous tools are present even if there is no necessity for these, adding cost for the end user in a stealthy way.
System Prerequisites
The main prerequisite to access minex3D service is to have an internet connection as the service is not local, and cannot be cached, or run from local server. Secondly, it is necessary for you as the user to be able to access the web through a Secure Sockets Layer (refer to http:// on unsecure web pages -vs- https:// on secure web pages).
Regarding the speed of your connection it can be any ranging from mobile 3G access to high speed DSL/cable or faster.
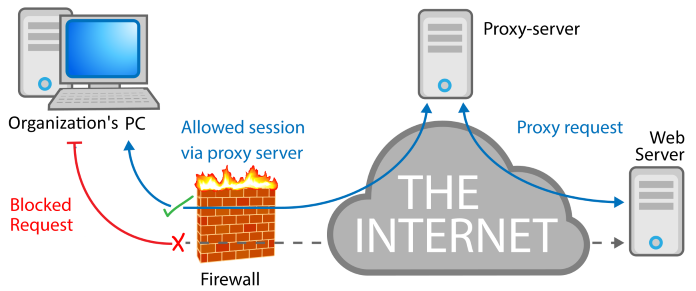
Regarding the protocols: when you access the internet the way a connection is handled, the scenarios vary, via your provider without a firewall, via your provider through a firewall, via your organization’s proxy server, (the first scenario is uncommon and for your own sake should be addressed by at least enabling your operating system’s firewall), in the other scenarios with a firewall or a proxy, and as mentioned above minex3D does not offer access through http:// unsecure or port 80, instead accepting requests through https:// secure or port 443, in most cases/machines/networks its enabled by default, if it is not your browser will return an error message like “Secure Connection Failed” or “Page Cannot be Displayed.”, in such case you need to allow all traffic over port 443, instructions to enable it can be found here for windows.
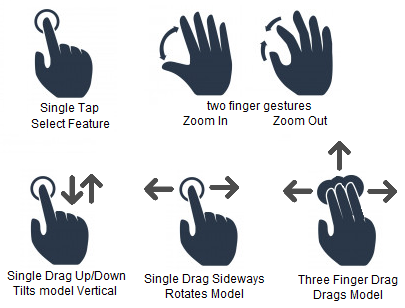
On input interface requirements, standard keyboard and mouse on PC, and capability for gesture actions (two & three finger touch detection) on mobile devices is needed for zoom and pan actions.
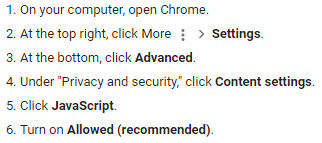
JavaScript Compliance: In order to be able to execute the minex3DApp one core capability of the browser has to be available and also has to be at the minimum compliance level – that is JavaScript or ECMAScript (meaning that the browser has to be up to the technological standards of scripting & 3D rendering), different browsers offer a different range and level of development of selected technologies, the next extract shows a partial comparison:
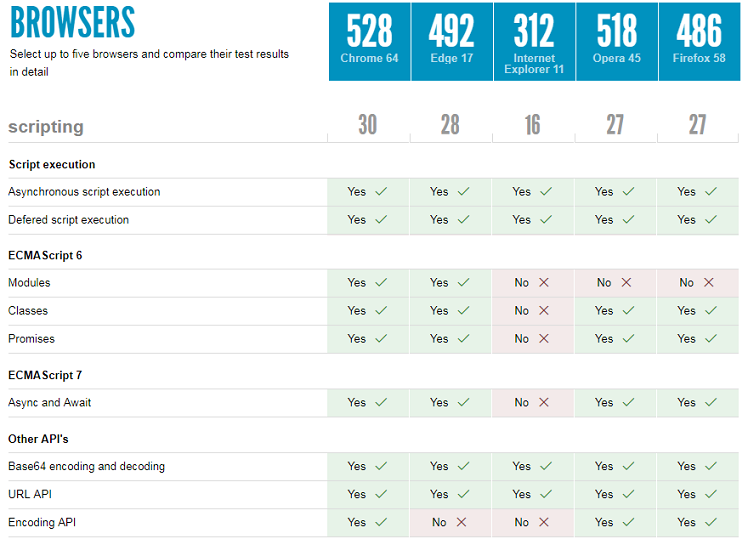
Currently minex3D.com does not support browsers that cannot execute full ECMA Script 6 standard and above, which means to you as a user that Internet Explorer in any version most likely won’t be able to run the 3D models. You can test your own browser for compliance here.
App Launch
After you follow a link to a your project or a demo, you will encounter the next set of events:
The app initialization:
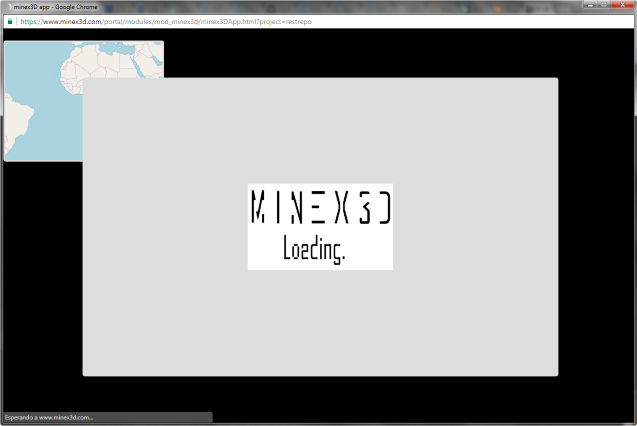
Since the minex3DApp is a thin client, there is no need for an installation, in turn that means that the programmed behavior is downloaded in packets to be run locally, that amounts to 1250KByte, that comes from various secure sources over the web including www.minex3d.com, the appearance of the app during this stage is as seen in the screenshot.
DB Requests & Download:
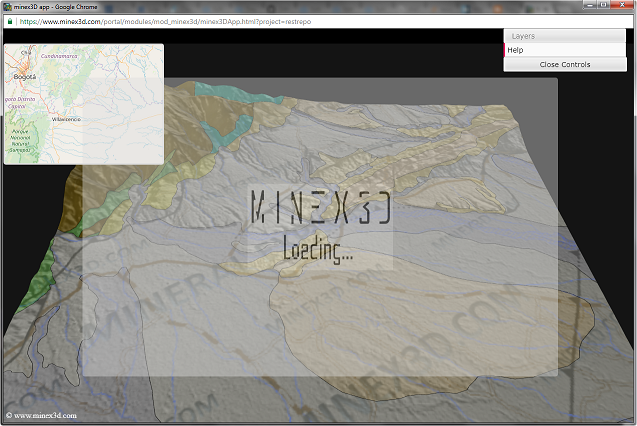
After the required libraries become available for the browser, the system determines what to fetch from the remote data base, this includes the target project, the versioning of the model, and the ownership, the querying, processing and download varies in time depending the size of the model, that ranges from 350KByte for simple & small models to several MByte (5MByte-9MByte) for large & multilayered models.
Time to Model Load:
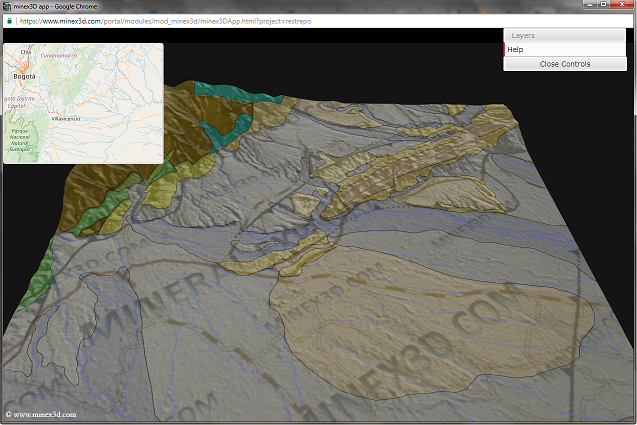
The demo:”restrepo” weights around 3.2MByte and over a cable connection has been tested to take 16sec to display on a PC, over 3G connections on a high-end cellphone the time for full load has been measured up to 60sec tested on MS-Edge browser. As the model load finishes, the control is handed over to the user to start the visualization.
Detours & defaults
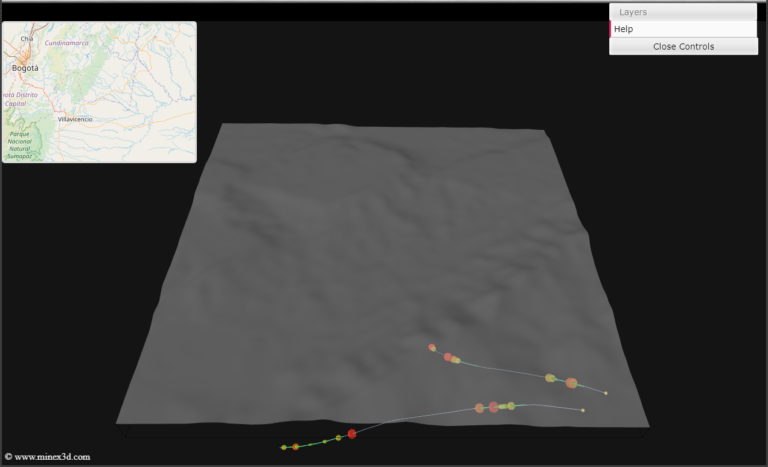
If by any reason the name of the project is misspelled, not defined, or the ownership is not correct (e.g. trying to access a private model being un-authorized), the app defaults to a minimal public demo model.
As a footnote: the upgrades and bug fixes for the minex3DApp are performed continuously on the central repository/server, so to be sure that you are on the latest version of the app it is advised to push the reload button of the browser to reset the cache and get latest versions of the program.
The Interface
The following section describes the visible parts of the interface and explains some behaviors for each.
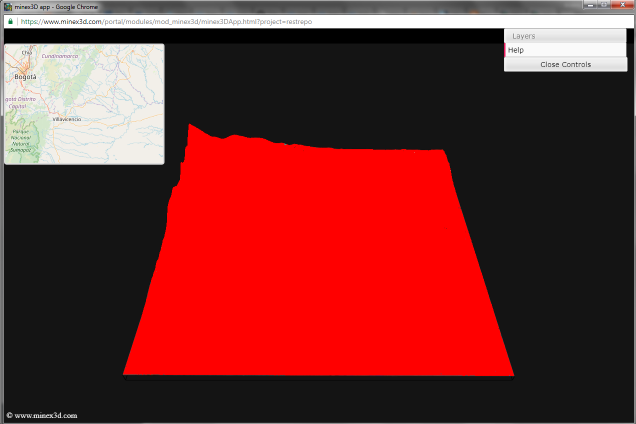
The 3D map: its where all the models are loaded, it runs on an implementation of webGL for JavaScript. Mouse/pointer interactions here return spatial results as selections or selectable area. Also spatial interactions to change the view are possible, including displacements, rotations, and zooms.
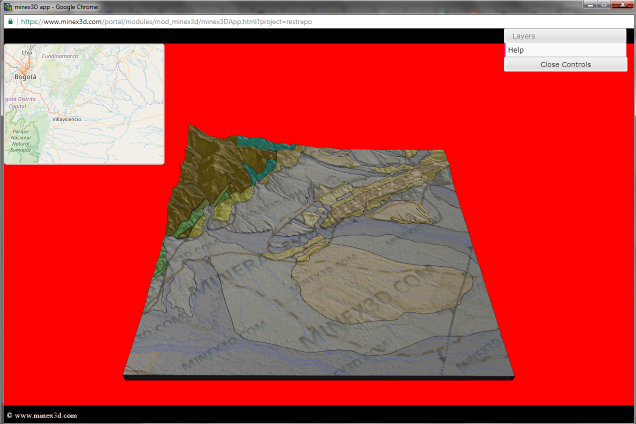
The 3D map extended: Only spatial interactions to change the view are possible within this area, including displacements, rotations, and zooms. No selection is possible as no element of the model is rendered in this area.
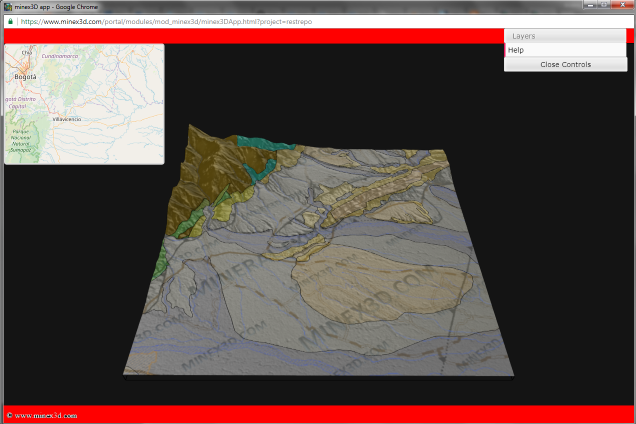
The top and bottom sections: these are reserved portions of the app screen that hold or will hold information messages, and buttons for upcoming functionalities of the app; these are placed in front of the 3D map areas so no selection nor properties can be changed if interacting with them.
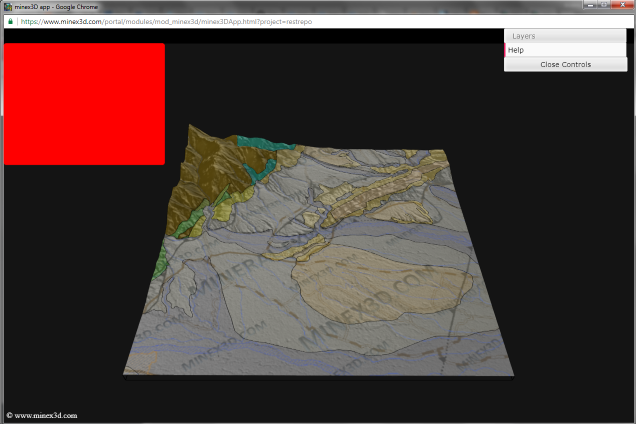
The mini map: by itself its an independent mapping application, here 2D maps give a geographic context for the 3D model. At present stage of development it only offers a convenient view, but no additional interactions have been published. Future development is expected to be defined on the wish list of the user-base of minex3D.com
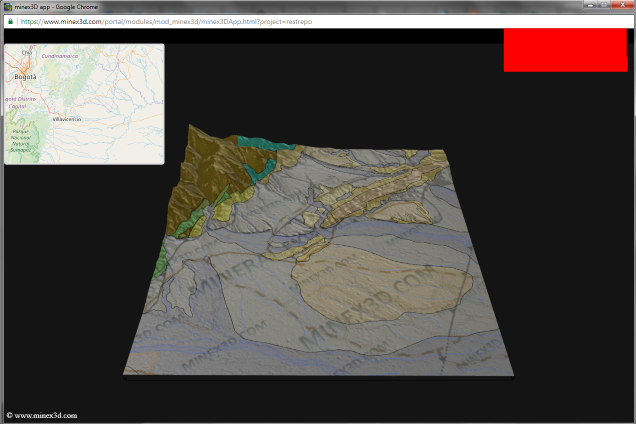
The user interface: gives some general information of the layers loaded from the remote DataBase, and allows the user to manage the layers, their visibility, and some specific display configurations. Other functionalities that will become part of the system will also be added to this menu and will offer enhanced control and interaction over the 3D models and datasets.
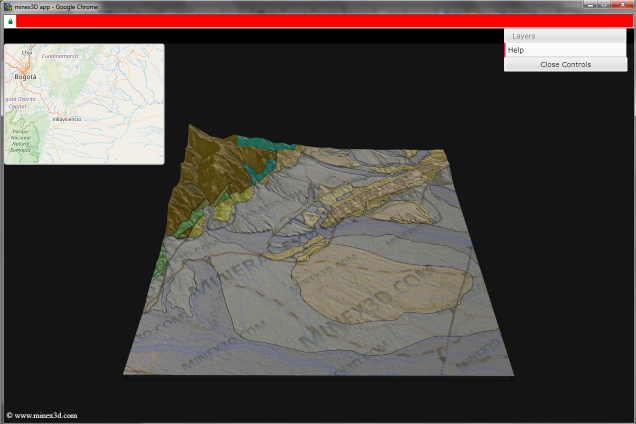
The browser URLbar: can be used to pass additional parameters during initialization of the webApp in order to preconfigure the appearance and other properties in the following style:
…/minex3DApp.html?project=…&round=…#cx=…&cy=…&cz=…&tx=…&ty=…&tz=…
After the html all optional: the “project name“, the “round / version” of the model, the “center” of the 3D view in model’s coordinates, and the “transform / rotation” around xyz axis.
Controls and Interaction
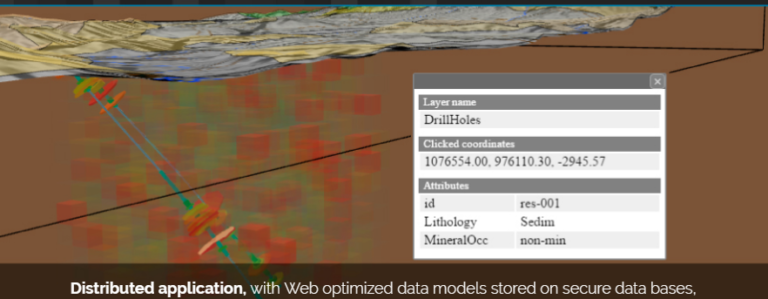
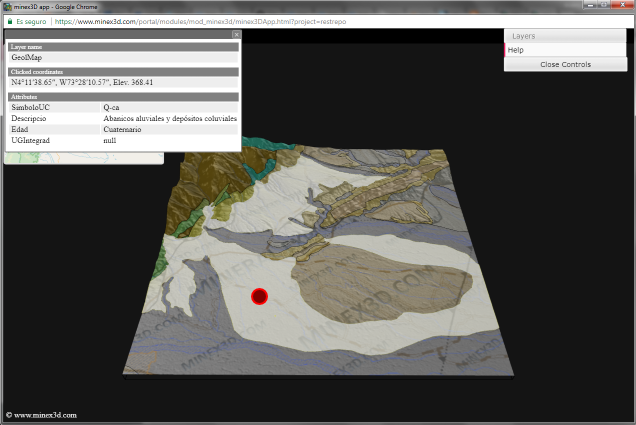
On model selection: the most immediate interaction with the 3D model is the selection of features/locations; this returns an info popup that allows to review data (if available) for the selected feature including coordinates (in lat – lon – elevation), selecting another feature returns info for the newly selected feature. Enacting the selection on the extended map area (outside the 3D model) closes the info popup.
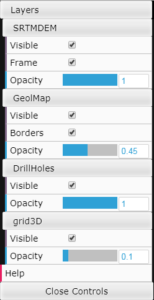
By default the layers menu is loaded but collapsed, upon opening it each layer appears by name also collapsed, each layer’s submenu offers different interactions, common to all layers is visibility on/off, opacity 0-1 (transparent to opaque).
The load of layers is not an interactive task, so the layers have to be predefined in the user’s management interface before using the app; the management interface also allows the creation of new projects, deletion of projects, upload and analysis of data, etc. and is not considered as part of this tutorial.
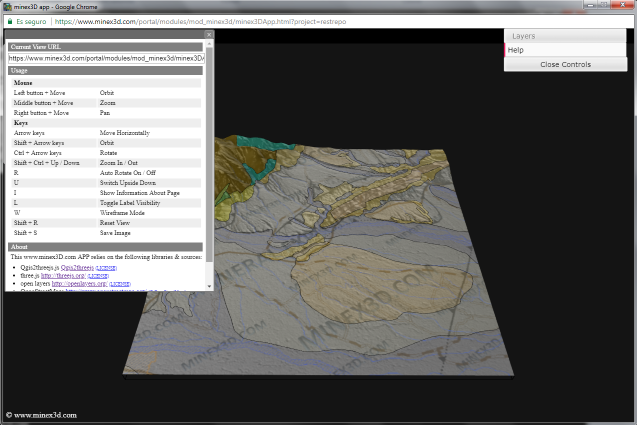
The help popup can be toggled from the user interface menu, and includes a list of standard keyboard shortcuts, plus the credits for the technologies that minex3D relies upon.
The help popup also closes if the “extended 3D map area” is clicked.
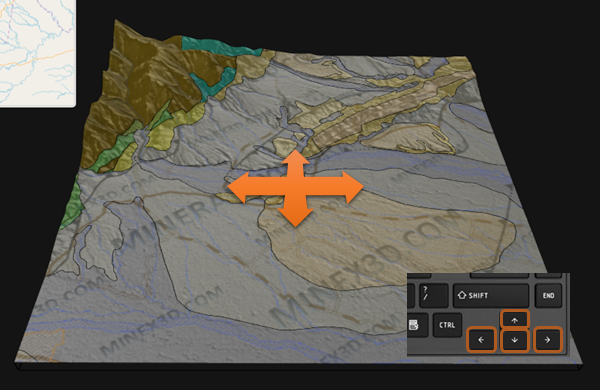
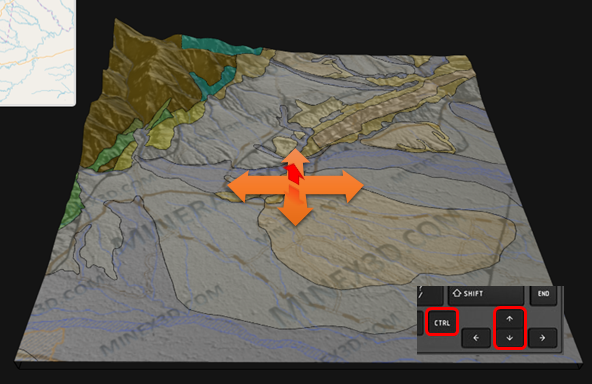
The interactions with the 3D display for visualization can be done by mouse or by keyboard shortcuts; horizontal displacement is achieved pressing mouse right button and moving the mouse, the precise horizontal displacement is done via keyboard using the arrows. The vertical and horizontal forward and backward displacements are entangled using the mouse and depend on the angle of view of towards the model.
The vertical displacement of the model can be achieved by combining control key + up or down arrows. This is an absolute displacement and is ideal from keyboard to place the model exactly relative to the viewer.
For zoom in – out can be done by pressing middle button and moving the mouse back and forth, or by rotating the wheel in the direction of the desired zoom. From keyboard the combination of SHIFT+CONTROL+UP or DOWN arrows gets the model zoomed at controlled intervals.
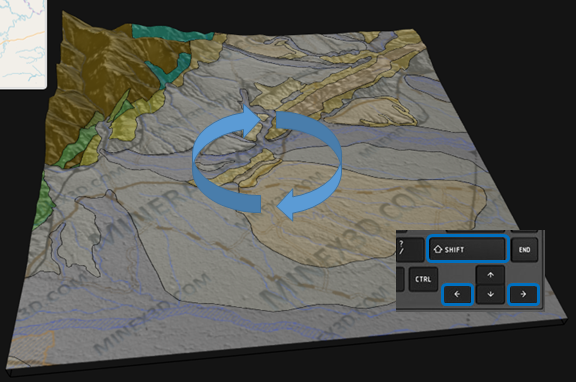
Rotation around the z axis of the current center of model can be achieved by pressing mouse left button and moving the mouse sideways, alternatively pressing (any)shift key on the keyboard + right or left arrows. As the position of the center can become non ideal after many uncontrolled manual displacements, the original position of the model can be restored by pressing SHIFT+R keys.
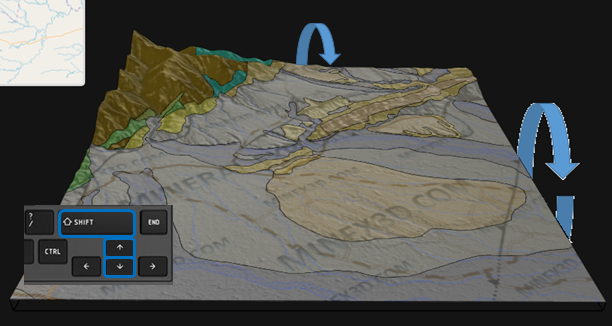
Rotation around the x axis of the model’s current center is done by pressing mouse left button and moving the mouse back and forth. For controlled intervals of adjustment the shift key + the up and down arrows can be used.
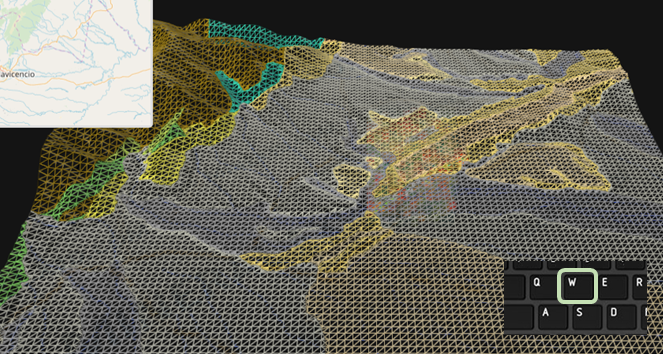
Other actions that are keyboard only are summarized here: toggle wireframe mode on/off by pressing W key; Hide/show GUI menu by pressing H key, Hide/show the minimap manually by pressing the F key.
A note on the minimap: it is programmed to show only on devices that have large format, meaning that if the view on PC becomes cluttered because of a change in the size of the browser window, or if the application is loaded on a small tablet of mobile device (cellphone etc.) the minimap will hide until the size interferes with the 3D model.
Mobile Device Controls
Modern touchscreen devices offer multi-touch capabilities, such capabilities are required for the basic use of the minex3DApp, bellow the gestures and their function in the application.
This tutorial is the first of a series of tutorials that are being prepared on various topics of usage, configuration and management of the minex3D application, and user interfaces. Also as new developments come out, these will be accompanied with announcements and tutorials.
If you have any questions or comments regarding this post please send us an email to the following address: info@minex3d.com adding “comment:generaltutorial” before your own title to the subject!
